 Buy me a coffee


Contents
Figure 1: How to Run Any GitHub ML Repo in Google Colab Without Local Setup — a borrowed GPU in a browser tab, which is the closest thing most of us have to a research cluster
You found a great ML repo, but your laptop has no GPU and a Python environment held together by hope. Google Colab gives you a browser notebook with a free GPU, and most repos run there in a handful of cells. This is the exact sequence I use, including the four traps that waste the most time.
One honest caveat before the steps: "any repo" is aspirational. A repo that needs eight A100s will not run on a free T4 no matter how clean your cells are. What follows gets almost anything startable, and tells you early when the answer is "rent a GPU instead".
What You Need
Three things: a Google account, a browser, and the repo's URL. Colab runs in the cloud, so you install nothing locally — not Python, not CUDA, not the twelve system libraries the README forgot to mention [1].
What you do not get is a guarantee. Colab's free tier is interactive compute with a 12-hour ceiling and idle timeouts, not a reserved server [1]. Plan for that from the first cell rather than discovering it at hour eleven.
Step 1: Open the Repo in Colab
There are two starting points, and the first one saves the most time.
If the repo ships a notebook
Many repos include .ipynb files. Open one directly by rewriting the URL: replace github.com with githubtocolab.com and leave the rest alone. A link like githubtocolab.com/OWNER/REPO/blob/main/NOTEBOOK.ipynb redirects straight into Colab.
The longer form works the same way:
https://colab.research.google.com/github/OWNER/REPO/blob/main/NOTEBOOK.ipynb
Look for the "Open in Colab" badge first. Repos that ship one have usually tested the notebook on a clean runtime, which is worth more than a badge-free repo with a hopeful README.
If the repo has no notebook
Open a fresh notebook at colab.research.google.com and write the setup cells yourself [4]. That is the next four steps.
Step 2: Switch to a GPU Runtime
Do not skip this. A new notebook gets a CPU runtime unless you change it, and CPU training is how an afternoon disappears.
Go to Runtime → Change runtime type, pick a GPU, and save. Then confirm it from inside the notebook:
!nvidia-smi
You want a table with a GPU name and a memory figure. The free tier usually assigns a T4 with 16 GB when capacity is available [1]. Then check that the framework agrees:
import torch
print(torch.cuda.is_available())
print(torch.cuda.get_device_name(0))
If is_available() is False while nvidia-smi works, you are probably in a Python environment where PyTorch was installed without CUDA support — which is exactly the kind of problem the next step creates.
Step 3: Clone the Repo and Install Dependencies
This is the main event, and it is three lines:
!git clone https://github.com/OWNER/REPO.git
%cd REPO
%pip install -q -r requirements.txt
Notice the %cd, not !cd. Each ! command runs in its own shell, so !cd REPO changes a directory that disappears immediately. The %cd magic changes the notebook's actual working directory, and every later cell inherits it. This trips up almost everyone once.
Use %pip, not !pip, when you can. %pip installs into the kernel that is actually running your code; !pip can target a different interpreter and leave you with a package that imports nowhere.
Do not reinstall PyTorch
Colab already ships PyTorch and the other heavy libraries. Reinstalling them burns minutes, and it can replace a CUDA-enabled build with a CPU-only wheel — the exact failure from the previous step.
Check what you already have:
import sys, torch
print(sys.version.split()[0], torch.__version__, torch.version.cuda)
If requirements.txt pins an old torch, strip that line before installing:
!grep -viE "^(torch|torchvision|torchaudio)([=<>! ]|$)" requirements.txt > requirements-colab.txt
%pip install -q -r requirements-colab.txt
Start with the runtime's versions and only pin when the repo actually breaks. If the repo ships a pyproject.toml or uv.lock, uv resolves the dependency graph much faster than pip, but the install still has to agree with Colab's CUDA build.
Fixing version conflicts
When pip and Colab disagree, work through this order:
- Restart the session after installing (Runtime → Restart session), then rerun from the top.
- Install the failing package alone with the version the repo expects.
- Relax the pin for packages Colab already provides, if the code still runs.
- Check the repo's issues page — someone has almost certainly hit your exact error.
Step 4: Handle Data and Storage
Colab's local disk vanishes when the session ends. Mount Drive before you download a dataset or train anything you care about [2]:
from google.colab import drive
drive.mount('/content/drive')
Then point the repo's data and output paths at Drive, or copy results there:
!mkdir -p /content/drive/MyDrive/ml-runs
!cp -r outputs/* /content/drive/MyDrive/ml-runs/
Copy checkpoints after each epoch, not at the end. A disconnect does not warn you, and the runtime's VM is deleted once it sits idle [1].
One performance note: training straight into Drive is slow for many small files, because every write crosses the network. Keep the hot data on /content and sync checkpoints to Drive on a schedule — that is the same separation of code and state I use when I containerize a research repo.
Step 5: Store API Keys Safely
Many repos want a Hugging Face, OpenAI, or Weights & Biases token. Never paste a key into a cell — it ends up in the saved notebook, in the output, and in any copy you share.
Colab has a secrets manager for this [3]. Add the key under the key icon in the left sidebar, enable notebook access, then read it:
from google.colab import userdata
import os

os.environ["HF_TOKEN"] = userdata.get("HF_TOKEN")
userdata.get returns None if the secret is missing or access was not granted, so a confusing 401 usually means a checkbox, not a bad token.
Step 6: Run the Code
Now run the repo's actual entry point — small first:
!python train.py --config configs/tiny.yaml --max_steps 50
One epoch or a tiny subset catches path errors, missing packages, and shape bugs in minutes. Running the full job first is how you spend three hours to learn that a config key is misspelled.
Does the repo launch a web UI? Gradio apps accept --share, which creates a public link because the Colab machine is not directly reachable [5]:
!python app.py --share
Treat that link as public. Anyone who has it can use the app while your runtime lives, so do not expose anything sensitive, and stop the cell when you are done.
Know the Limits Before You Start
- 12-hour ceiling. Free notebooks run for at most 12 hours, depending on availability and usage [1].
- Idle timeouts. Runtimes are deleted when idle for a while, and the VM has a maximum lifetime enforced by Colab [1].
- Interactive use only. Colab prioritises interactive compute; long background jobs, especially on GPUs, can be terminated, and file hosting or media serving is explicitly disallowed [1].
- No guaranteed GPU. During peak demand a free session may get no GPU at all [1].
- 16 GB of VRAM. A T4 will not fit every model. Drop to a smaller variant before you start optimizing.
- Paid plans stretch the limits. Colab Pro+ supports continuous execution for up to 24 hours while you have compute units [1]. Check the current plan details before buying, because they change.
A Reusable Setup Cell
This is the cell I paste at the top of every Colab project. It clones, installs, and proves the GPU is real:
#@title Colab setup: clone, install, check GPU
import os, subprocess, sys

REPO = "https://github.com/OWNER/REPO.git"  #@param {type:"string"}
BRANCH = "main"                             #@param {type:"string"}

name = REPO.rstrip("/").split("/")[-1].removesuffix(".git")
root = f"/content/{name}"

if not os.path.isdir(root):
    subprocess.run(["git", "clone", "--depth", "1", "--branch", BRANCH, REPO, root], check=True)
os.chdir(root)

if os.path.exists("requirements.txt"):
    subprocess.run([sys.executable, "-m", "pip", "install", "-q", "-r", "requirements.txt"], check=True)

import torch
print("cwd:", os.getcwd())
print("cuda:", torch.cuda.is_available(),
      "|", torch.cuda.get_device_name(0) if torch.cuda.is_available() else "cpu")
sys.executable -m pip is the important detail. It installs into the same interpreter that runs the cell, which avoids the "installed but cannot import" loop that !pip causes in some runtimes.
Save the notebook to Drive, and next session you rerun one cell instead of rebuilding the environment by hand.
Which Repos Work Well in Colab?
- Inference and demos: excellent fit. Download weights, run, and play.
- LoRA and 4-bit fine-tunes: good fit for small models, as long as the base model fits in 16 GB.
- Tutorial and course repos: ideal, especially the ones that ship Colab badges.
- Large-scale pretraining: poor fit. You will hit the time and memory walls before the first checkpoint.
- Multi-GPU or distributed training: skip it. Rent a machine — my GPU cloud comparison covers the options.
Colab is a proving ground, not a training cluster. Use it to check that the code runs, the data loads, and the loss goes down, then move the real job.
Privacy and Data Warnings
Anything you upload to Colab leaves your machine. That includes datasets, model weights, and anything a notebook prints. Do not put confidential or personally identifiable data in a free runtime.
If the data belongs to an institution, check with its research data or compliance office before uploading, and prefer synthetic or anonymized samples for the first run. A public Gradio link makes this worse, because the app can serve whatever the notebook can read.
Common Pitfalls
- Forgetting the GPU. Run
!nvidia-smibefore you train, not after. - Using
!cd. It does nothing useful; use%cd. - Reinstalling PyTorch. You may replace the CUDA build with a CPU wheel.
- Saving only to local disk. Copy checkpoints to Drive as you go.
- Running the full dataset first. Test on a slice.
- Hardcoding secrets. Use Colab secrets, and rotate anything you already pasted.
- Ignoring the README's pins. The repo usually names the exact Python and library versions it was tested with.
- Leaving a share link open. Stop the Gradio cell when you are finished.
One meta-mistake: treating a working notebook as a working environment. If you will run the repo more than twice, spend the hour to containerize it — the same Dockerfile runs on Colab, on a rented GPU, and on your laptop.
Best Book to Read
| Cover | Book | Description | Get it |
|---|---|---|---|
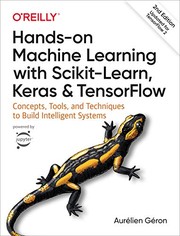 |
Hands-On Machine Learning with Scikit-Learn, Keras, and TensorFlow | notebook-first explanations of the models you are about to run, so the repo's config files stop looking like incantations. | View on Amazon |
As an Amazon Associate I earn from qualifying purchases. Links on this page are affiliate links, and I may earn a commission at no extra cost to you.
Read the chapter that matches the repo, not the whole book. Running code you half understand is how a tutorial becomes a habit instead of a skill.
Wrapping Up
Running a GitHub ML repo in Colab takes six moves: open a notebook, switch to a GPU, clone and install, mount Drive, load secrets, and run a tiny job first. The free tier is genuinely good for demos, small fine-tunes, and learning.
Pick one repo you have bookmarked, paste the setup cell, and run it today. You will learn more in twenty minutes than in a week of reading READMEs. Which repo will you launch first?
Frequently Asked Questions
Is the free Colab GPU enough to train a model?
For demos, inference, and small LoRA or 4-bit fine-tunes, yes. For pretraining or anything that needs more than about 16 GB of VRAM, no. Use it to prove the pipeline works, then move the real run to a rented GPU.
Why does Colab say no GPU is available?
Free GPU capacity is not guaranteed and runs out at peak times. Try Runtime > Disconnect and delete runtime, then reconnect and pick a GPU again. If it still fails, you are on a CPU-only session and should retry later rather than train on CPU by accident.
How do I keep my files after Colab disconnects?
Mount Google Drive and copy checkpoints there after every epoch. The runtime's local disk is deleted when the session ends, and a disconnect can end it without warning.
Can I run a repo that needs multiple GPUs in Colab?
No. A Colab runtime gives you one GPU, so distributed training code will fail or silently fall back to a single device. Rent a multi-GPU machine for those repos.
How do I open a GitHub notebook directly in Colab?
Replace github.com with githubtocolab.com in the notebook URL, or prefix the path with https://colab.research.google.com/github/. Both open the same file in a Colab tab.
Sources
[1]Google Colab, Frequently Asked Questions — runtime limits, idle timeouts, GPU availability, interactive-use policy, Pro+ execution: research.google.com/colaboratory/faq.html[2]Google Colab, External data notebook — mounting Drive and moving files in and out: colab.research.google.com/notebooks/io.ipynb[3]Google Colab, Secrets notebook —userdataand notebook access: colab.research.google.com/notebooks/secrets.ipynb[4]Google Colab, Welcome to Colaboratory — runtime types and opening notebooks from GitHub: colab.research.google.com/notebooks/intro.ipynb[5]Gradio, Sharing your app —share=Truepublic links and their limits: gradio.app/guides/sharing-your-app


 Get Free Course Notes →